はじめに
ISAS解析サーバではNASA/GSFCで開発された高エネルギー天文学データ解析用のソフトウェアパッケージ、HEASoftが使えます。
HEASoftについての詳細は http://heasarc.gsfc.nasa.gov/docs/software/lheasofを参照してください。
この文書は解析サーバにX線天文学の知識を持たないシステム管理者がHEASoftをインストールする際に用いる内部向けマニュアルを少々書き直したものです。各サイトで初心者がHEASoftのインストールを行う際の手助けになれば幸いです。それぞれの環境に応じて、directory名などは読みかえてください。
HEASoftは数ヶ月に一回更新されます。
2010年10月にバージョン6.10がリリースされました。この文書では、バージョン6.9から6.10の更新の例について説明します。その後の更新については、
6.9 --> 6.10, 6.10-->6.11のようにバージョン番号を読み換えてください。
1. installの方法
ソースからコンパイルする方法と、アーキテクチャごとのバイナリをインストールする
方法がある。ISAS解析サーバではLinux (klm, mgl)においてはソースから、Mac (twa) にはバイナリからインストールしている。xrayというアカウントを利用する。まず、Linuxでソースからインストールし、次にMacからバイナリインストールする。
同じディスクをマウントしていて、directoryや設定ファイルをLinuxとMacで共有してる。
以下ではまずLinux上でのインストール方法を説明し、次にMac上でのインストール方法を説明する。
2. ソースコードのダウンロード
http://heasarc.nasa.gov/lheasoft/download.htmlからソースコードを含むパッケージをダウンロードする。
(1) Linux server: source install の場合
このページから以下を選択して、heasoft-6.10src.tar.gzをdownloadする。
STEP 1 - Select the type of software:
にて、"Source code distribution"を選択
Although the source code may be compiled on any supported platform, for project statistics...
では、適当なOSを選択する。
STEP 2 - Download the desired packages:
にて、"ALL"を選択し、submitをクリック。
これで、heasoft-6.10src.tar.gzというfileがdownloadされる
3. tar file の展開
/usr/local/xray/heasoft/に展開する。以下を確認のこと。
klm{xray}% ls -l /usr/local/xray/heasoft
klm{xray}% tar xvfz heasoft-6.10src.tar.gz
klm{xray}% ls heasoft-6.10/
attitude   CMakeLists.txt  ftools   heagen               heatools  README.CYGWIN       suzaku  tcltk
BUILD_DIR  demo            heacore  HEASOFT-INSTALL.TXT  integral  Release_Notes_6.10  swift   Xspec
4. コンパイルとインストール
http://heasarc.gsfc.nasa.gov/lheasoft/install.html
に従う。同文書中の、
*****************************************************************************
                        INITIALIZATION AND SETUP
*****************************************************************************
と書いてある直前までを実行する。ただし、
make distclean
は、不要。
5. ISAS独自の環境設定
5.1 Directory名の変更
ダウンロードしてきたパッケージを展開すると、
/usr/local/xray/heasoft/heasoft-6.10
というdirectoryができているが、これを
/usr/local/xray/heasoft/6.10
と変更する。つまり、以下を実行する。
cd /usr/local/xray/heasoft
mv heasoft-6.10 6.10
5.2 スクリプトの追加、修正
scripts 保管場所は、/usr/local/xray/setup/。
ISASの環境に合わせ、以下のとおりscriptsや設定ファイル追加、修正を行う。
setup_heasoft${version}.[sh,csh]を追加する。
以前のversionのスクリプトをコピーし、修正する。
cp setup_heasoft69.csh  setup_heasoft610.csh
cp setup_heasoft69.sh   setup_heasoft610.sh
として新たなファイルを作成する。新たなファイルの中でバージョン番号を以下の通り、修正する。
# HEAsoft V6.9
set version = 6.9
を
# HEAsoft V6.10
set version = 6.10
に変更する。
/usr/local/xray/setup/setup.txtを以下のように修正する。
修正前:
< HEASOFT && HEADAS >
 heasoft       : heasoft v6.9
 heasoft69     : heasoft v6.9
修正後:
< HEASOFT && HEADAS >
 heasoft       : heasoft v6.10
 heasoft610    : heasoft v6.10
 heasoft69     : heasoft v6.9
つまり、heasoftで始まる行のバージョンを更新し(6.9 --> 6.10)、
その下に、最新のバージョンに対応する新たな行を追加する。
5.3 環境の確認
which xraysetup
で、
alias xraysetup="source /usr/local/xray/setup/xraysetup.sh"
とaliasが設定されていることを確認する。
xraysetup
と入力する。以下のように、上で行ったsetup.txtの編集が反映されていることを確認する。
klm{xray}% xraysetup

Usage: xraysetup [TYPE]

< HEASOFT && HEADAS >
 heasoft       : heasoft v6.10
 heasoft610    : heasoft v6.10
 heasoft69     : heasoft v6.9
 heasoft66     : heasoft v6.6
 heasoft65     : heasoft v6.5
 heasoft641    : heasoft v6.4.1
 heasoft64     : heasoft v6.4
6. 動作試験
klm{xray}% xraysetup heasoft610
と入力する。以下の環境変数が設定されていることを確認する。
echo $LHEASOFT
echo $LHEA_DATA
echo $LHEA_HELP
LHEASOFT =/usr/local/xray/heasoft/6.10/i686-pc-linux-gnu-libc2.3.4
LHEA_HELP=/usr/local/xray/heasoft/6.10/i686-pc-linux-gnu-libc2.3.4/help
LHEA_DATA=/usr/local/xray/heasoft/6.10/i686-pc-linux-gnu-libc2.3.4/refdata
ただし、libc2.3.4のところはLinuxのバージョンによって変わる。
which fdump
と入力しfdumpがパスに含まれていることを確認する。
同様に、fv、 xspecについても確認する。以下のように出力されるはずである。
/usr/local/xray/heasoft/6.10/i686-pc-linux-gnu-libc2.3.4/bin/fv
/usr/local/xray/heasoft/6.10/i686-pc-linux-gnu-libc2.3.4/bin/fdump
/usr/local/xray/heasoft/6.10/i686-pc-linux-gnu-libc2.3.4/bin/xspec
6.1 fdump
fdump /usr/local/xray/caldb/data/suzaku/xis/bcf/ae_xi1_teldef_20080303.fits /tmp/tmp.out - -
で、/tmp/tmp.outというアスキーファイルに、ae_xi1_teldef_20080303.fitsというFITSファイル(バイナリファイル)の
内容が書き込まれる。それが、
/home/xray/admin/2009FY/heasoft_install/6.9-20100331/fdump-out.txt
に一致することを確認する。
以下の試験には、X window接続が必要。
6.2 fv
fv /usr/local/xray/caldb/data/suzaku/xis/bcf/ae_xi1_teldef_20080303.fits
が動作することを確認。
以下のように二つのウィンドウが立ち上がればよい。
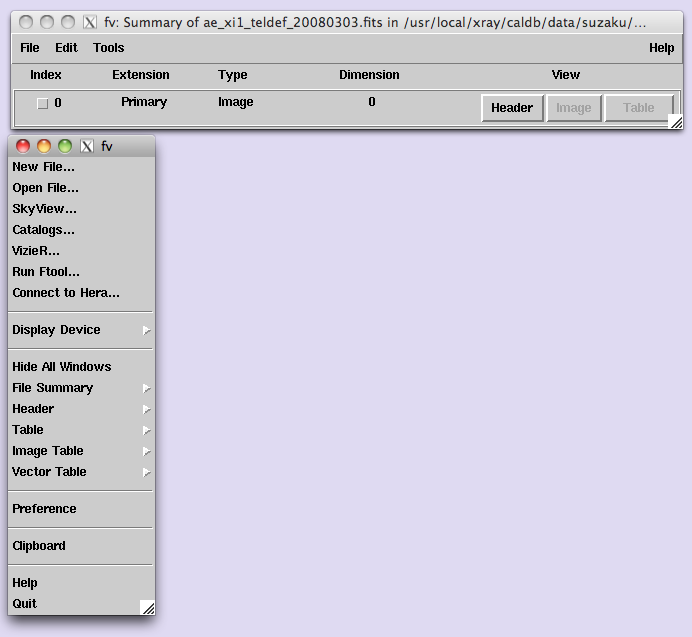
確認したらメニューからQuitをクリックして終了する。
6.3 xspec
以下の手順でxspecの動作を確認。
cd /darts/asca2/61002000/spectra
xspec
ここからxspecのコマンドを以下のように入力。
data ad61002000g210170_1.pi.gz
ignore 0.0-0.5 10.0-**
setplot energy
cpd /xs
plot ldata
以下のように正しいスペクトルが表示される事を確認。
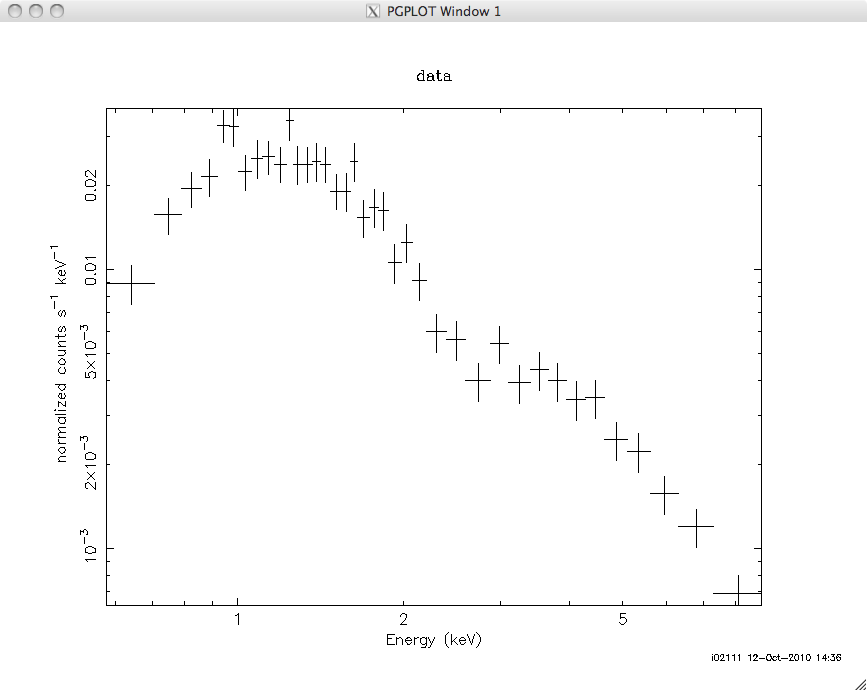
そのあと
exit
quit
でxspecを終了する。
7. Macにバイナリーインストールする手順
まず、上記に従って、Linuxマシンに同じバージョンのHEASoftがインストールする。
7.1 ダウンロード
http://heasarc.nasa.gov/lheasoft/download.htmlから以下を選択する。
Step1, pre-compiled binary distribution
Mac Intel - Darwin 10.x (OS X 10.6.x)
Step2, All
submitボタンをクリックし、
heasoft-6.10mac_intel_darwin10.tar.gz
をdownload する。
ファイルを/usr/local/xray/heasoft/archive/heasoft-6.10mac_intel_darwin10.tar.gzに保存する。
7.2 インストール
作業directoryに移動する。作業後にファイルを残す必要がないので、どのdirectoryでも良い。
ここでは、仮にそれを/scratch/xrayとする。
ファイルを以下のコマンドで展開する。
tar xvfz /usr/local/xray/heasoft/archive/heasoft-6.10mac_intel_darwin10.tar.gz
作業directoryの下にheasoft-6.10というdirectoryができることを確認する。
ls /scratch/xray/heasoft-6.10
HEASOFT-INSTALL.TXT Xspec/ f77demo.fits heagen/ image/ suzaku/
README.CYGWIN attitude/ ftools/ heatools/ integral/ swift/
Release_Notes_6.10 demo/ heacore/ i386-apple-darwin10.4.0/ spectral/ tcltk/
作業directoryから標準directoryに必要なファイルをコピーする。
cp -rp /scratch/xray/heasoft-6.10/i386-apple-darwin10.4.0 /usr/local/xray/heasoft/6.10/
http://heasarc.nasa.gov/lheasoft/install.htmlに従って設定を行う。
この文書中の以下の部分を実行する。
*****************************************************************************
STEP BY STEP INSTALLATION INSTRUCTIONS
*****************************************************************************
...
3) Configure the software for your platform (necessary for both binary and
source downloads):
...
* If you downloaded the binary distribution, go to the
heasoft-6.10//BUILD_DIR directory:
cd heasoft-6.10//BUILD_DIR/
where = e.g. "i686-pc-linux-gnu-libc2.3.4" or "i686-pc-cygwin"
...
./configure > config.out 2>&1 & (Bourne Shell variants)
つまり、今の場合は以下を実施する。
cd /usr/local/xray/heasoft/6.10/i386-apple-darwin10.4.0/BUILD_DIR
./configure > config.out 2>&1 &
config.outの中を見て、エラーがないことを確認する。
7.3 動作試験
上記の6.に従って、Mac上でも動作確認をする。
パスは、/usr/local/xray/heasoft/6.10/i386-apple-darwin10.4.0の下にあるはずである。
8. デフォルトを最新版に更新
LinuxとMacで最新版の動作試験の後、/usr/local/xray/setup/の下の
setup_heasoft.csh, setup_heasoft.shが最新のバージョンを指すように修正する。
これによって、最新版がデフォルトになる。
バージョン6.9では
setup_heasoft.csh -> setup_heasoft69.csh
setup_heasoft.sh -> setup_heasoft69.sh
となっていたシンボリックリンクを
setup_heasoft.csh -> setup_heasoft610.csh
setup_heasoft.sh -> setup_heasoft610.sh
とする。
以上。